
Implementing Protected Routing with NextAuth v5

In this article I am going to teach you how to protect both client side and server side routes with NextAuth v5 in your next js application.
NextAuth.js is a widely used authentication library for Next.js applications, and with the release of version 5, several notable improvements and changes have been introduced. In this latest version, one significant update is observed in the middleware system. The middleware API has been enhanced, offering more flexibility and control over authentication flows and access control.
So Let’s start..
Step 1 — Create a new next js project and install required packages
In this article I am not going to tell you how to create a next js application but as the nextAuth we need the latest version.
npm install --save next-auth

Step 2— Setup the nextAuth providers inside the application
For this example, we will be using Google as our auth provider. Now inside your Next app, create a new folder called “services” and inside that create a new file called auth.ts. After creating that add following code to that.
import NextAuth from 'next-auth';
import GoogleProvider from 'next-auth/providers/google';

export const {
  handlers: { GET, POST },
  auth
} = NextAuth({
  providers: [
    GoogleProvider({
      clientId: process.env.GOOGLE_ID as string,
      clientSecret: process.env.GOOGLE_SECRET as string
    })
  ],
  pages: {
    signIn: '/login'
  }
});
Make sure to create a .env file and add the google clientId and the clientSecret.
Then inside your Next app, create a new folder inside api directory (inside your pages directory) and name it auth . Inside that folder, create a folder called (*case sensitive) [...nextAuth] and inside that create a file called route.ts
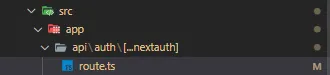
After creating that file make sure to add following codes to that.
export { GET, POST } from '../../../../services/auth';
export const runtime = 'edge';
Now that we are done with setting up the providers, it’s time to wrap all the components & routes around another component that provides auth state to our entire app, similar to React’s useContext API. Inside your rootlayout.ts file, wrap the components around SessionProvider.
import './globals.css';

import Navbar from '../components/nav-bar/navbar';
import { SessionProvider } from 'next-auth/react';

export default function RootLayout({
  children
}: {
  children: React.ReactNode;
}) {
  return (
    <html lang="en" className="h-full">
      <body className="h-full flex flex-col">
          <SessionProvider>
            <Navbar />
            <main className="flex-1">{children}</main>
          </SessionProvider>
      </body>
    </html>
  );
}
Step 3 — Implement all the signIn and signOut functions
Then you have to implement all the signIn and signOut functions using nextAuth. But in this article I am not going to implement those functions. I just show you how to protect the required routes.
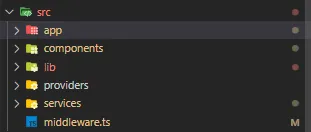
Step 4 — Create a middleware to protect both client side and server side routes
In this approach we are going to use a middleware to protect both client side and server side routes. For that first you have to create a new file called middleware.ts inside the src folder and add the following code to that.
import { NextResponse } from 'next/server';
import type { NextRequest } from 'next/server';

const protectedRoutes = [
  '/dashboard',
  '/profile',
];
const unprotectedRoutes = ['/', '/login'];

import { auth } from './services/auth';

export default async function middleware(request: NextRequest) {
  const session = await auth();

  const isProtectedRoute = protectedRoutes.some((prefix) =>
    request.nextUrl.pathname.startsWith(prefix)
  );

  if (!session && isProtectedRoute) {
    const absoluteURL = new URL('/', request.nextUrl.origin);
    return NextResponse.redirect(absoluteURL.toString());
  }
  if (session && unprotectedRoutes.includes(request.nextUrl.pathname)) {
    const absoluteURL = new URL('/dashboard', request.nextUrl.origin);
    return NextResponse.redirect(absoluteURL.toString());
  }
}
According to this code, there are few “protectedRoutes” and “unprotectedRoutes” routes. So you can add or remove any route from these arrays to protect your routes in next js application.